/> Pearls Before Swine: February 2017

Monday, February 27, 2017

DIY Doggy Treats, Only Three Ingredients!


diy dog treats, do biscuits, dog bone recipe, diy doggy treats, pearl before swine,

Who doesn't love to spoil their do? We all do right? However, you don't want them eating something bad for them. These DIY Doggy Treats will definitely solve that problem! 

Made from all natural, safe, healthy ingredients that your dog is sure to love. I know mine do! They hang in the kitchen all morning until they are ready. LOL! 

Another nice thing about this recipe is that it only has three ingredients and most you should have on hand at home. 

Ingredients:

1 C coconut flour
1 C all natural peanut butter
4 large eggs

Directions:

Combine all ingredients into a medium sized mixing bowl. 

Mix together very well. 

Shape into 1" balls or roll out or use your favorite cookie cutters. 

Bake on a lined cookie sheet with parchment paper at 350 degrees F for 17-20 minutes or until hard and slightly browned. 

Let cool completely before serving to your best friend! 

diy doggy treats recipe, homemade dog bones, recipe for dog treats, pearl before swine,

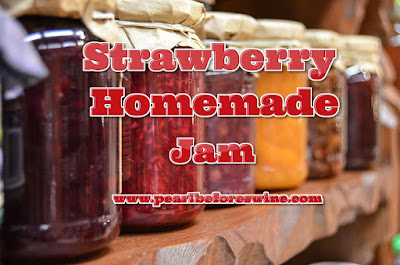
Strawberry Homemade Jam


strawberry homemade jam, recipes, toast, strawberries, old-fashioned.

What is more old-fashioned than strawberry jam? 

Simply making it reminds me of being young and in the kitchen working with my Mom and Grandma. 

Oh, the smell of fresh strawberries simmering in sugar would fill the house with such a sweet aroma. 

This recipe is short, easy and tastes delicious! Let's get started. 

Ingredients:

5 cups of strawberries
(fresh or thawed if frozen)
5 T lemon juice
1 T corn starch
1 1/2 C granulated sugar

Directions:

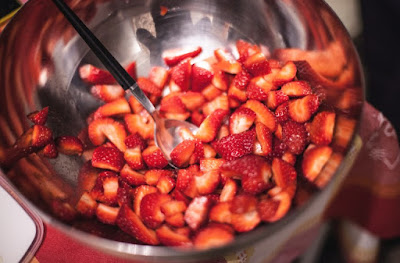
Add washed strawberries to a medium sized pot. I used a 4-quart saucepan. 

Mash up the strawberries. A potato masher or fork works great! 

Homemade Strawberry jam by pearl before swine, recipes, jam, strawberry

Pour the lemon juice into a sandwich size zip tight bag. Add the cornstarch. 

Seal and shake the bag until the cornstarch and lemon juice mix together and dissolves. 
Pour mix into the pot with strawberries. 

Add granulated sugar and stir until all ingredients are well mixed together. 

Return to stove top and set the burner to medium heat. Bring mixture to a rolling boil. Allow the jam to boil for 20-25 minutes, stirring often. 

When ready the jam should coat the back of a spoon thickly. 

Remove from heat and allow to cool before jarring. Refrigerate jam in new mason jars.

The jam will stay fresh for weeks, maybe even a month or so if refrigerated cold with a tightly sealed lid. 
 
strawberry jam homemade by pearl before swine recipe, jam, toast


Thursday, February 23, 2017

S'mores Brick (Shibuya) Toast


Happy National Toast Day!! 

When it comes to bread, there aren't many recipes I haven't heard of. Until I came across a dessert called Shibuya Toast. Originally from Shibuya, Tokyo and is a Japanese style of French Toast but much sweeter. Served with a number of delicious topping from berries, bread, maple syrup, ice cream, and of course whipped cream. 

Another way to make it is called honey toast or honey bread. Which is a toasted and buttered brioche or Asian flat top bread. Topped with honey, ice cream, whipped cream, and fruits or candy. 

Like every new recipe, I prefer to make it mine and do something different than what I have already seen. So, why not a s'mores version? I haven't seen that as of yet (I will now of course) and it sounds just heavenly. 

Ingredients:

1 white bread loaf
2 T honey
1-3 T butter
1 T sugar
2 T vanilla

Butter mix:
Take butter and whip in sugar. Add vanilla,  mix. Brush cube pieces and inside loaf. 

Topping:
chocolate syrup
graham cracker crumbs
1 handful of mini marshmallows
whipped cream

Optional:
vanilla ice cream
cherry
nuts

Below is a wonderful infographic I created to help show you the process (LOL!!!) Hey, I tried! It was hard making this in under ten minutes. 


Directions:

Preheat oven to 360 degrees.

Cut bread loaf in half. Take each half and half again. 
Carefully cut out the center of halved loaf. Gently pull out square cube. Leave good edges and a bottom. 

Take square and cut into little cube pieces. Brush each piece with butter mix, as well as, the inside of the loaf. 

Place on a parchment lined cookie sheet. Bake for 8-10 minutes until lightly golden brown. For the broiler method I would cook 3-5 minutes and watch those babies like a hawk, they will burn. 

Remove from oven and let cool. 


For a cheaper version, you can stack normal white bread about 4 slices. 

Once cooled take bread cubes and marshmallows and fill the loaf. Drizzle with honey. Top with chocolate syrup, whipped cream, and graham cracker crumbs. 

Oh my goodness, YES!! This is so, so very good. Crunchy toast that is sweet and filled with yummy gooey marshmallows, drizzled with chocolate and topped with graham crackers. 

I hope you like my take on Shibuya toast, enjoy and if you try it leave your comments below! Be use to share with your friends and family. 

Wednesday, February 22, 2017

Homemade Cheese Sauce For Mac & Cheese


There is something special about Mac & Cheese. Maybe it is because we grew up eating it or maybe it reminds us of being home?  

For me,  it brings me back to my youth. Nothing can really beat a big ole bowl of macaroni. It's warm,  cheesy...great now I want some!  

You get the point,  we've all had it. However,  have you ever made your own?  It can't be beat,  totally trumps regular box Mac & Cheese. 

For this recipe,  you can use which ever noodle you prefer.  They can be made prior or during. You choose. 

I like to make my noodles ahead of time and let them cool a bit before adding my sauce. 

Ingredients : 

3 T butter
1/4 C flour
2 t mustard powder
2 C milk
1 C American Cheese
2 C sharp cheddar
1 C Parmesan cheese
Salt and Pepper

In a medium skillet add butter,  flour. Stiring until mixed. When the butter starts to bubble,  reduce heat to low. 

Add milk,  and stir very well with a whisk. 

Add mustard powder. Stir until well mixed. Slowly add cheese a cup at a time. 

Simmer on low,  stirring constantly to avoid the milk burning. About 5 minutes or until cheese is all melted. 

Now,  add your cooked well drained pasta. Mix until all the noodles are good and coated. 

Salt and pepper to taste,  add parsly for garnish and serve warm. 

Refrigerate leftovers. 

Wanna get crazy?  Let's bake it!  

Transfer mixed noodles and  sauce to an over safe dish. 

Sprinkle the top with bread crumbs. To make my own I use normal white bread,  toast in the toaster. Then I add it to the food processor. Boom!  Homemade. They work great,  a little more texture than regular bread crumbs. 

Bake at 325 for 10 minutes. You just want the crumbs to brown slightly. 

And devour!  Your family will thank you!  


Tuesday, February 21, 2017

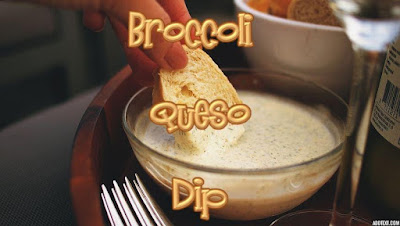
Easy Cheesy Broccoli Dip


broccoli queso cheese dip pearl before swine

Do you like broccoli? My kids hate it! However, I don't let that stop me from making this delicious cheesy broccoli queso dip. 

This is a great dip for entertaining a large group, one because it is rather inexpensive to make and two it is super easy. I feel like I say that in all my recipes but that seems to be the case. Either that or I just bend more towards the easy and simple. 

For this recipe, you are going to need some ingredients that may sound strange but hang with me. I was like soup and mayo? Are you crazy? It really is good! 

Ingredients:

2 C milk
1 C mayo
1 C sour cream
1 jar 16oz Ortega Salsa drained, or a salsa you prefer. 
2 C shredded cheese
1 bag of Broccoli soup mix

Directions:

In a large bowl add milk, mayo, sour cream and stir very well until mixed. 

Add drained salsa, shredded cheese, and soup mix. Stir again. Make sure all the ingredients are well combined. 

Transfer to an oven safe dish for baking. Bake at 350 degrees for 20 mins or until the cheese is good and melted. 

Serve with bread or chips. Refrigerate leftover dip. 

broccoli cheese queso dip pearl before swine


Homemade Irish Soda Bread


Digging through old family recipes today I came across this recipe for Homemade Irish Soda Bread. Haven't every trying it before I took to the kitchen and whipped up a loaf.

I found the recipe quite easy and the bread was delicious!

Ingredients:

4 cups flour
1/4 cup sugar
1 T baking powder
1 1/2 t salt
1 t baking soda
6 T butter
1 cup drained currants
2 T caraway seeds
1/2 buttermilk

Directions:

In large bowl add flour, sugar, baking powder, salt, baking soda and mix well.

Add butter, room temperature cut into little cubes.

Next mix in currants, caraway seeds, and buttermilk.

Mix very well, until it starts to pull away from the bowl.

Using floured hands, knead dough 1-3 minutes.

Shape dough into flattened ball. Place on large greased cookie sheet or line with parchment paper.

Cut a 1/4" deep X into top.

Preheat oven to 350°
Bake for 1 hour, makes 1 loaf.


Absolutely one of my favorite breads, must be the Irish in the genes!

Take care, be sure to share this yummy bread with your friends and family.

Sunday, February 19, 2017

Fantastic Dough, You should know!

What makes this dough so fantastic?

Fantastic Dough, you should know. Good for making pizza, rolls, and bagels. Find it at Pearl Before Swine. Pizza dough, cinnamon roll dough, bagel dough.

Not only is it easy to make but most ingredients you should already have on hands such as flour, sugar, water, olive oil, and salt. The only nonessential ingredient you'll need is instant active yeast. Super cheap, it can be found at any grocery store.

The second most fantastic thing about this dough is it can be used for three different recipes. Pizza, Cinnamon Rolls, and Bagels.

Shoot, if I tried hard I'm sure I could come up with a few other recipes. Like it may make an okay bread or rolls. You could use a Carmel or honey sauce and make monkey bread.

Point being, the possibilities are Endless.

Ingredients:
3 cups all-purpose flour
1 1/2 T sugar
1 t yeast
1 cup plus 2 T warm water
1 T olive oil
1 1/2 t salt

Directions:

🍀 In a small bowl or a kitchen aid mixture, place flour, sugar, warm water, and yeast. Water should be warm but not above 120°.

🍀 Combine ingredients, let sit 2 minutes.

🍀 Add the remaining ingredients, olive oil, and salt.

🍀 Cover hands in oil.

🍀 Knead dough for 1 minute.

🍀 Cover dough, lightly in oil. Place in plastic wrap or closed lid container.

🍀 Place in fridge for one day. Let warm to room temperature before use.

Recipe One: Skillet Pizza

Fantastic Dough, you should know. Good for making pizza, rolls, and bagels. Find it at Pearl Before Swine. Pizza dough, cinnamon roll dough, bagel dough.

Roll dough to 12" size round circle. Place in oiled cast iron or oven safe skillet/pan.

Top with 1/4 c pizza sauce. Add 1/2 c or 4 oz. Mozzarella cheese, thinly sliced pepperoni. Dot a few days of pesto.

Sprinkle with oregano, salt, and pepper.

Heat skillet on medium high, cook 3 minutes or until bottom starts to set.

Transfer to an oven preheated to 425° bake for 20 min. Or golden brown.

Remove from oven, let sit minutes and serve.

Recipe Two- Cinnamon Rolls

Fantastic Dough, you should know. Good for making pizza, rolls, and bagels. Find it at Pearl Before Swine. Pizza dough, cinnamon roll dough, bagel dough.

Roll out dough as big as you can, making sure it is not too thin.

Make topping mixture by combining 1/2 C sugar, 1/2 brown sugar, and 4 T cinnamon. Stir well.

Butter top side of dough. Sprinkle generously sugar mixture.

Roll dough and slice in 1" pieces.

Bake at 375° for 12-15 minutes or until golden brown.

Top with cream cheese frosting. Add 8oz tub cream cheese with 1 cup powdered sugar. Add vanilla 2 t and a splash of lemon juice. Stir very, very well. A mixture works best. Leave cream cheese out to soften before use for smoother frosting.

Fantastic Dough, you should know. Good for making pizza, rolls, and bagels. Find it at Pearl Before Swine. Pizza dough, cinnamon roll dough, bagel dough.

Recipe Three: Bagels

Fantastic Dough, you should know. Good for making pizza, rolls, and bagels. Find it at Pearl Before Swine. Pizza dough, cinnamon roll dough, bagel dough.

Cut dough in 4 oz sections or about a 2" thick piece.

Roll into 10" length rope. Connect loose ends together to form a ring.

In a large pot bring 6 cups water to a boil. Cook bagels a few at a time for 2 minutes. Turning over occasionally.

Fantastic Dough, you should know. Good for making pizza, rolls, and bagels. Find it at Pearl Before Swine. Pizza dough, cinnamon roll dough, bagel dough.


With a slotted spoon remove bagels and transfer to the topping mixture. Turning to coat all sides, if you'd like.

Then place on parchment lined cookie sheets. Bake at 425° for 25 minutes or until golden brown.

Topping Mixture

In three small separate bowls add poppy seeds, dried onions, and sesame seeds.

Fantastic Dough, you should know. Good for making pizza, rolls, and bagels. Find it at Pearl Before Swine. Pizza dough, cinnamon roll dough, bagel dough.

You can also make fantastic calzones. Make 6 dough ball. Place on a cookie sheet evenly spaced. Leaving room for them to flatten out. Add pizza ingredients like before. Fold in half. Seal edges by pressing together. Bake 400° for 25 minutes or until golden brown.

Fantastic Dough, you should know. Good for making pizza, rolls, and bagels. Find it at Pearl Before Swine. Pizza dough, cinnamon roll dough, bagel dough.

So many easy, quick recipes from one simple dough. You could even triple the dough recipe to have enough for dinners for the week.

Thanks and check back often for more fun recipes!

Monday, February 13, 2017

Make Your Own Shari's Berries, At Home!


Happy Valentine's Day! 

Valentine's Day is tomorrow, what better way to celebrate and save some money at the same time with your very own homemade Shari's Berries! 

If you have not had a Shari's Berry before, let me explain to you what you've been missing out on. 

They are from heaven above, dipped, drizzled, and surrounded with chocolate nut covered love!! However, that is just my opinion. You may not like strawberries, chocolate, coconut or nuts? If you do, though these bad little beauties are for you! 

With a little practice, you'll be mastering the art of fruit dipping with ease. My only real tip is when dipping your fruit, make sure you have a firm grip of the fruit, not the stem. The reason being is that chocolate is heavy and thick. When you dip the fruit for the first time it has a tendency to stick. Which then removes the stew and the fruit falls into the hot melted chocolate. You'll spend the next few minutes fishing it out. To avoid this. I normally use a metal skewer used for fondue. 

The recipe I've found is Shari's recipe. You can read her story of how she got started here.  It is a pretty amazing story, very inspiring! 


INGREDIENTS
  1. One 12-ounce bag semisweet chocolate chips
  1. Strawberries washed and patted completely dry, with paper towels. (If you don’t start with completely dry strawberries, it will ruin the chocolate.) Leave green stems intact.
(optional) 1 tsp. orange, hazelnut or mint extractDIRECTIONS
  1. Put chocolate chips in microwave safe bowl. Melt chocolate chips in 30-second increments, in the microwave, stirring each time until the chocolate is completely melted. (After you make them the first time you can experiment with using your defrost setting and going a bit longer than 30 seconds between stirring.)
  1.  Add flavored extract here, if you decided to use one. Pour melted chocolate into fondue pot or Crockpot.  Keep warm on the lowest setting. Stir occasionally, if needed.
  1. Grasp the strawberry by the green top, roll the strawberry into the chocolate, and give it a little shake when you pull the strawberry out of the chocolate. Point the strawberry upward, and allow the chocolate to cover most of the strawberry.

  1. You may want to drizzle strawberries with a little white chocolate.  If you want sprinkles or nuts, sprinkle the strawberry, while the chocolate is still soft. Place dipped strawberry on waxed paper. Store dipped strawberries in the refrigerator.

Yummy! Make some for your friends and family too, they'll love you for it! 

Happy Valentine's Day from me to you, thanks for following and sharing my posts!! 

Friday, February 3, 2017

Spring Time Is Around The Corner...

With Spring Time just around the corner, it got me thinking about my garden. Every year, I plant various fruits and veggies. And every year I grow absolutely, Nothing! If it does produce any fruit or veggies, they aren't worth eating. 

So, I'm on a mission this year to find out why. 
Join me as we try to discover...


What Type Of Soil Do You Have? 

"A good garden is as good as its soil!" 

Having the proper soil is essential to having a healthy garden. You can't have one without the other! That being said, what is good soil? 

There are three main soil types clay, sandy, and loamy. However, depending on your climate and vegetation, as well as the underlying rock that is present. Loam soil tends to be the best as it is a mixture of clay, sand, and silt. This soil is very fertile compared to most other soils. 

How do I know my soil type? 

To determine what type of soil you have to work with, I suggest doing an easy test. This can be done with a jar that has a lid, and a sample of your soil. 

For this test you'll need:

1. Large Jar- I prefer to use an old pickle jar that has been thoroughly cleaned. 
2. A sample of your soil.
3. Water

First, you'll need to fill your jar about halfway up with soil. Go to the area of your yard you plan on using to start the garden. 

Next, add just enough water to almost fill the jar. Leave some room for air towards the top, about 1". 

Last, shake it like crazy! Then, leave it in a safe place to sit overnight. The next morning your soil should be broken down into three sections. Sand, silt, and clay. 

Thank you! Gardners Edge for this wonderful infographic!! 

Once you have determined what kind of soil you have, you can start figuring out what needs to be added to create a more healthy soil so your plants can thrive! 

What can you add to make your soil better? 

Now you have an idea of what type of soil you have, but is that what you need to grow your garden? In most cases, probably not! To increase the nutrient levels in the soil you can add a number of different organic materials, most of the time you have them on hand already. 

 
Worms are wonderful for the garden! They create air pockets and til the dirt. Their poop also helps add nutrients, gross I know! 

Eggshells-  Add a building material all plants need to grow and produce. Without it, they don't grow as fast and in some cases, for Tomatoes or Squash, they have developed blossom rot. 

Coffee Ground- Coffee ground that has not been used will increase the PH level in your soil. Used ones will not. So check your PH levels before adding fresh coffee grounds. Used coffee grounds can be added to the soil mixture.

Banana Peels- Contain nutrients that are essential for a healthy garden. As the banana peels decompose they add nitrogen, phosphorus, magnesium, and potassium to the soil.  

Livestock Manures- Manure are so good for your soil. I know that sounds pretty gross when you think about it. My garden is grown in poop? Yes! The nutrients in the manure are readily available for plants to start using right away.  

Okay, my soil is ready! Now what? 


"We Plant!!" 

You probably don't live in Arizona like I do. Which we fondly call "the third ring of hell!" That being said, knowing what to plant and when helps in the success of your garden. 

I know from looking at the map from the USDA that we are zones 7, 8, and 9. 


Every plant whether it be a fruit, herb or veggie has an ideal time for planting. They are very easy to locate online with just a simple search.


From the chart above for zone 7, I can see that I should have started planting about 2 days ago. Always a late bloomer! 

They let you know when you should start your seeds indoors, how much growing time is expected, and when to transfer your new plant outdoors. 

This helps so much! I have planted late in the season and it took forever for the plant to even grow. Nothing of real significance produced and was just a huge waste of time, money, water, and energy. 

So to wrap things up:

1. Know your soil type
2. Determine health of the soil. 
How does it grow stuff? Fast or slow? If slow, it needs more nutrients. 
3. Add nutrients. 
4. Plant each plant according to your zone, soil type, and climate. 

Wall-la! You should have a healthy thriving garden!