/> Pearls Before Swine: March 2017

Monday, March 20, 2017

How to make a twig cross, using things around the house and yard!


Every now and then I come up with a cool project idea. Well, today was another one of those days! 

I've been thinking of a neat way to represent the upcoming Easter holiday and in my house, we don't celebrate with eggs and little bunnies. Not that they aren't cute and sweet, it just doesn't convey the correct message. Easter bunnies, candy, and baskets do not represent Christ, His death on the cross, and His rising from the dead on the third day. 

Recently doing some Pinterest searches for ideas I saw a lot of people using burlap and an empty wooden frame. They'd use the burlap to form a cross shape around the frame and secure it with a pretty ribbon or bow. 

After looking for at a few pictures I got to searching around the house. We have a huge Jacaranda tree in the front yard that just recently dropped all of its leaves and branches. They are the perfect twigs for this project, as you'll soon see. I'm sure any small and medium size branches will work. 

Let's get to crafting...


Here are the materials that I used to complete my twig cross:

Twigs small and medium sized in lengths from around the yard.
Old fabric, I used an old table cloth in a tan color. 

That is all!! 

I thought I'd need the glue sticks and was presently surprised that I did not need it. Winning!  


Start by separating the twigs into two piles. Small and medium. 


Lay the long ones with all the ends lining up as even as possible. For me, the twigs have a pointy end. So I pointed those ends towards the bottom. 


For the smaller twigs, I made two even piles and then placed the two together, with the ends facing the opposite direction. So each side for me had pointy ends sticking out. 


Depending on how thick your twig grouping is will determine how thick and long the fabric piece will need to be. You want it to be strong enough to hold all the twig cross pieces together. 

I used about an 1" wide by 14" length fabric piece for tying them all together.


Place the fabric on the underneath side of the twig bundle. Place center twig piece in the middle, towards the top. Remember you want a cross shape, not a T. 


Then with a crisscross pattern, fold over the ends of the fabric. Repeat the folding one more time around. Making sure the ends all meet in the back of the twig cross. Tie ends in two strong knots.  


Wal-la! Now you can add any decorating that you'd like, I left mine just as it is. 


I hung my new twig cross on the front door and I'm really happy with how it turned out. Especially, having never made one before. I hope you enjoy this easy to do Easter/Resurrection day diy craft.  


Thanks for hanging and I'll talk to you soon! 

If you found this fun and useful, please be sure to share the love! 


Wednesday, March 15, 2017

My new obsession...Polymer Clay Charms! Plus, how to make your own!


polymer clay charms, sculptey clay, diy, kids, kids crafts, cute,

Working with clay has always been something I wanted to do. I remember all the cool crafts I'd make as a kid in school, which my awesome Mom still has by the way but with a busy life, it is almost impossible for me to get any free time to craft or create. I need that time, it helps me download and clear my head. Creating something from nothing is magic to me, nothing gets me more excited than to take something uncool and make it rock with radness! 

I got blessed with having extremely crafty girls. They are always blowing my mind with their creations. The charms are no exception. Kaitlyn found them on Instagram and Pinterest. At first, I kept thinking oh how is that even possible to make something so small and cute. How do you make an eye that tiny? It's crazy! 

Well after some research we hit the store. Sculpty Clay is what we use for all the charms we make and in less than a week, we've made quite a few already. The baking time is really quick in a low-temperature oven. 

I like Sculpty Clay the best because it has a large variety of color to choose from and it is super easy to work with. 

Today, I'll be quickly going through how I made a fox charm and the different items you'll need to make your own. Now, this does take a lot of patients but don't give up. It maybe won't work the first time, don't worry, just keep trying and you'll get it in the end. 

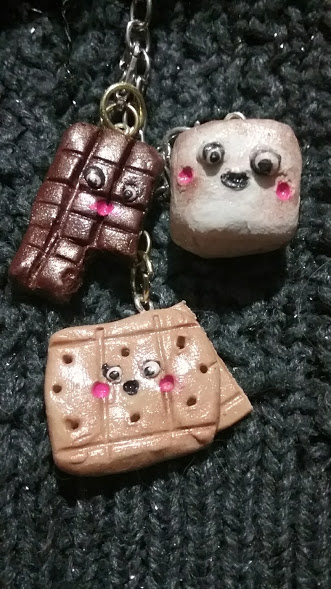
Remember these charms don't have to be perfect. You'll notice on the smores I made that the eyes are a little whack. LOL! My daughter teases me constantly. So what, I haven't perfected my eyes yet. I will and it is so much fun making her laugh at my sad attempts now in the mean time. 

To make this Fox Charm

polymer clay charms, sculptey clay, diy, kids, kids crafts, cute,

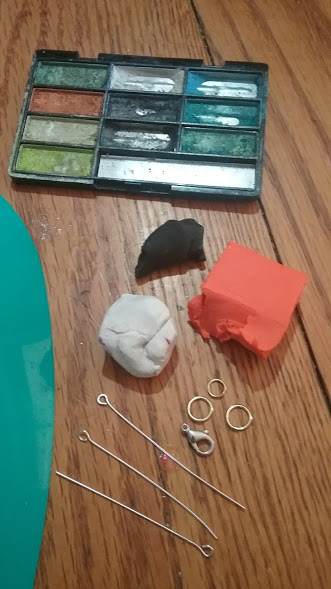
Materials you'll need:

old eyeshadow palette (optional for shading and highlighting)
Orange, White, and Black Polymer Clay
Jump Rings
Lobster Clasps
Eye Pins

polymer clay charms, sculptey clay, diy, kids, kids crafts, cute,

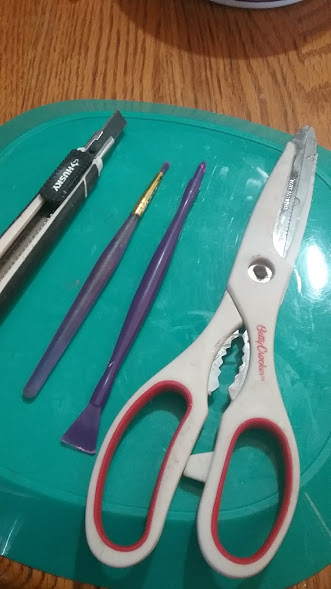
Tools you'll need: 

Scissors
pliers
dry paint brush for shading
 x-acto knife
a plastic plate or a clean working surface

polymer clay charms, sculptey clay, diy, kids, kids crafts, cute,

To start I took a small amount of orange clay and working it with my hands. I rolled it into a ball using the palms of my hands in a circular motion. 

Next, I grabbed more orange clay and started to form the body. I made the neck long tear drop shape. 

Attach the head carefully by pressing down on the body. Turn over and smooth the seams together from head to body. Making it a flat even surface. I would suggest doing this all around the charms head and all seams. Just make sure you preserve the shape you want. Too much smoothing can ruin a design, trust me I know from experience. 

Shape another small piece of orange clay for the ears and legs. The legs I made in a small tear drop shape as well. Place them on with the pointy end pointing down. 

Now you should have something like what is pictured below. 

polymer clay charms, sculptey clay, diy, kids, kids crafts, cute,

Last, I made the eyes. Which are hard for me, I never know if I should paint them or make them with clay. 

I used clay for the eyes in tear drop shapes as well. Small sides pointing together. Adding little slits of black with clay was so hard, I would maybe paint those on next time. Add little dots on the cheeks and done. 

For the tail, I used small amounts of orange and white. I formed somewhat of a tail shape and left that separate. 

Add the eye pins. One for the top of the foxes head. One below his bottom, and One more for the tail. 

This is where you can add any shading or extra color with the eyeshadows. I used a little bit of orange and glitter. 

Using the clay tools make small lines, not too deep along the body, head, and tail for fur marks. Add three little slits on the top of each foot. 

Bake in the oven according to your clay's directions. For me, I bake at 220 degrees for 20 minutes. When they are done. I turn the oven off and let them cool in the oven. 

BE SURE** to air out the oven before baking any food. Clay fumes can be toxic for your food. Always make sure you have properly aired out the oven before making any meals in there. 

Once cooled. Remove from oven. Using pliers I added the jump rings and lobster clasps. Connect to a short chain and you have a cute little charm! 


polymer clay charms, sculptey clay, diy, kids, kids crafts, cute,

Gloss with a Modge Podge that dries clear for a nice shiny look! 
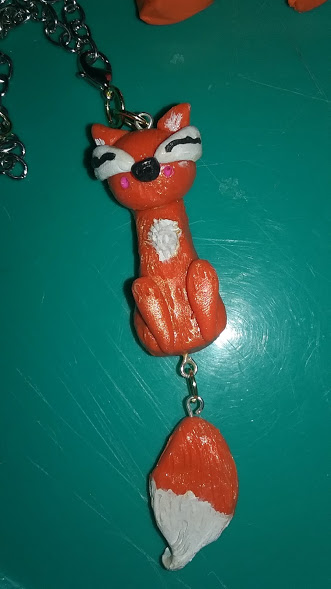
Below is the finished product! 

polymer clay charms, sculptey clay, diy, kids, kids crafts, cute,

We have been very busy...


polymer clay charms, sculptey clay, diy, kids, kids crafts, cute,

making charms...

polymer clay charms, sculptey clay, diy, kids, kids crafts, cute,

as you can see! 

polymer clay charms, sculptey clay, diy, kids, kids crafts, cute,

LOL! These are the s'mores I was telling you about! Those eyes, though!! 

polymer clay charms, sculptey clay, diy, kids, kids crafts, cute,

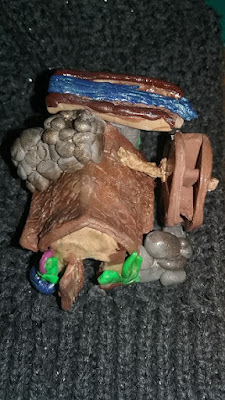
A water wheel and yes the wheel moves! 

polymer clay charms, sculptey clay, diy, kids, kids crafts, cute,

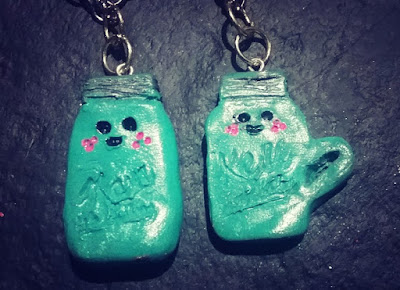
Cookie, coffee mug, coffee bean, and cookie monster charms! 

polymer clay charms, sculptey clay, diy, kids, kids crafts, cute,

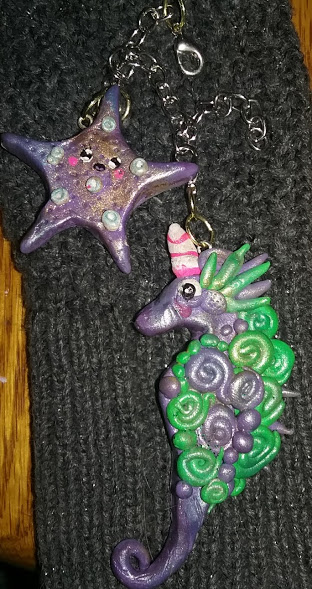
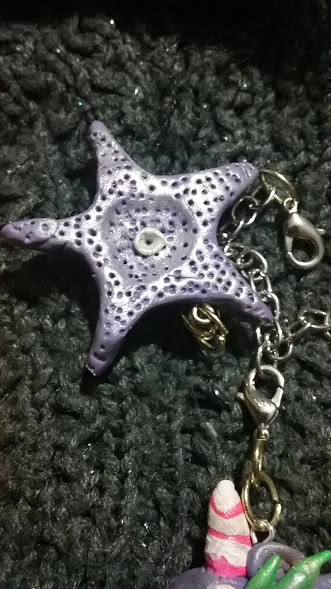
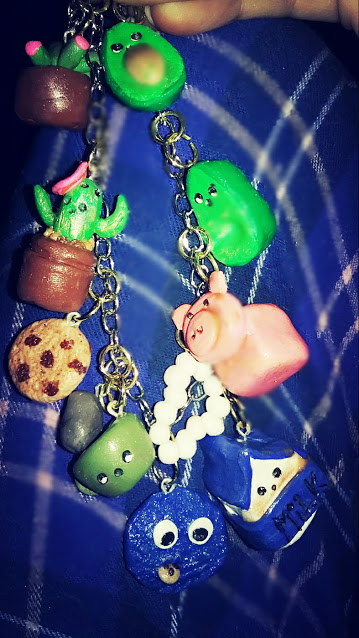
Avocados, cactus, pigs, and pearls! 

polymer clay charms, sculptey clay, diy, kids, kids crafts, cute,

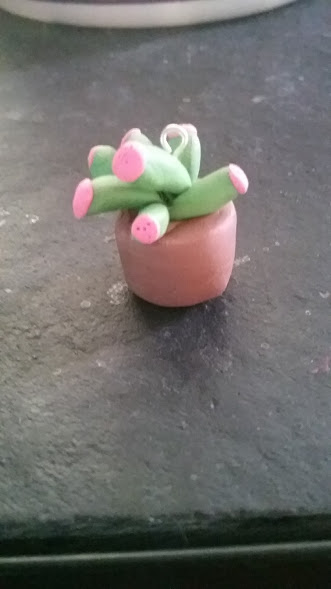
Cactus charms

polymer clay charms, sculptey clay, diy, kids, kids crafts, cute,

I also got creative and made a spoon rest with a cactus design. I am in love with this clay, so much fun to play with! 

polymer clay charms, sculptey clay, diy, kids, kids crafts, cute,

So, now you can see that I really have been obsessed with this sculptey clay and making charms. I wasn't lying! LOL! 

I hope you can have as much fun as I have. I really just enjoy the time with my daughter and making her laugh. She is so precious and the time is worth every second. 

**Updated 3/16/2017 

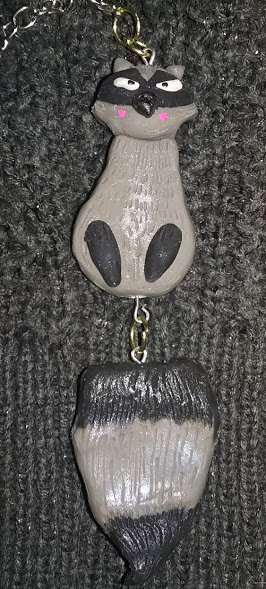
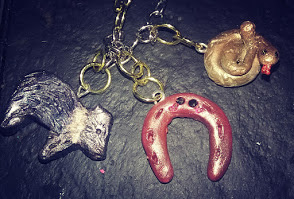
I've made more! 

polymer clay charms, sculptey clay, diy, kids, kids crafts, cute,

polymer clay charms, sculptey clay, diy, kids, kids crafts, cute,

polymer clay charms, sculptey clay, diy, kids, kids crafts, cute,


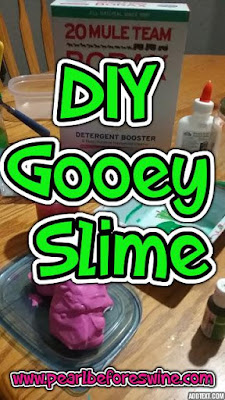
DIY Gooey Slime in just 9 easy steps!


slime, homemade slime, diy, kids, crafts, borax


Making slime has become one of the most popular kid's crafts. The ingredients are easy to get and to the best of my knowledge, it is kid safe and no toxic. I still would suggest not letting your kids eat it or put their fingers in their mouth after handling it. 

However, my daughter Kaitlyn is constantly creating new slime at home, if I can keep her shocked with enough glue. Someone at our grocery store is buying it by the carton I think because they never have any white or clear Elmer's glue. 

We found that getting in from Amazon is cheaper and you get more than what you can find in the stores. White glue can be used for making solid colored slime, whereas the clear glue works best for the slime that you want a little more translucent. 

Ingredients:

1 T Borax
1 cup Water
white or clear glue
food coloring
Medium to Large bowl
spoon

Optional:
glitter

1. In a small bowl, add 1 tablespoon of Borax with one cup of water. Stir to make sure the borax is fully dissolved. 

In a large or medium sized bowl, add as much white or clear glue as you like. Leave enough room in the bowl for the borax water solution. 

Add water to the mixing bowl with the white or clear glue. Keep in mind that you'll use the same amount of glue as you do water. 

For colored slime, this is where you can add the food coloring. Just a few drop, a little goes a long way. Note when they or you first make this slime, it WILL stain their hands, clothes, anything it touches. Once it has a chance to set up it doesn't bleed as much onto the hands. 

Mix using clean hands until the color is evenly distributed throughout the slime. 


So you’re probably thinking, “This is way too sticky to be slime.” It is because you haven’t added the final ingredient yet.

Add just a little bit of the borax solution at a time and keep mixing as you do. Adding the borax gradually gives you the consistency of slime you want in the end. It may take several additions to get it, too.

The only way to make a thicker or a runnier slime using white glue is to add more or less borax solution as you mix it together. You can’t just add water to make it runnier. This means you can make a variety of test consistencies of slime in several cups and figure out proportions of ingredients for the one(s) you need or like best. Then all you do is scale-up the formula to the quantity you want to have/need.

Keep kneading and working the goo until it has a smooth consistency throughout. It should start sticking together a little like bread dough.

 When you get the slime you want, take it out of the bowl and play with it – uh, that is, 
When you’re done learning as much as you want with your slime, just bag it up and throw it away in the trash. 

Luckily, you’ve got lots of Borax left to make it again and again, too!

Hint: If you used a full 8 oz bottle of glue, just fill it with water, swirl it to mix any extra glue, and pour it in. That’s the perfect amount of additional water.

Wash your hands! (You don’t want dirt and germs in your new slime before you’ve even made it.) It’s time to get messy in the name of science. Use your hands to mix the water and the glue solution in the bowl.


No Bake Cookies

no bake cookie, cookie recipes, oatmeal no bake cookies, cookies, easy cookie recipe, chocolate


I think everyone has had a No Bake cookie and if you haven't you should! I like to eat mine in the morning with a big fat cup coffee. Hey! They have oatmeal, that is a breakfast item! LOL! 

This recipe (and if you know me by now, you know what I'm going to say next) is super easy! Everything I post is super easy, with your occasional exception. Gotta keep them guessing! 

With this No Bake cookie recipe, you'll get about 24 cookies, not too much and not too little as well. I hate making cookies for hours and then the next few days no one eats them. I'm not into wasting food. This is the smallest recipe for them that I've seen so far but I haven't search far and wide either. 

Let's get to making some cookies...

Ingredients:

1/2 cup butter
1 1/2 cups granulated sugar
1/2 cup brown sugar
1/2 cup milk
4 T cocoa powder
pinch of salt
1/2 cup peanut butter
2 t vanilla
2 1/2 cups oatmeal uncooked

Directions:

In a medium saucepan add the first six ingredients and bring those to a boil. Boil for 1 minute. Stirring constantly. 


Remove from heat. Add the peanut butter into the saucepan and stir until completely mixed. 


Add in the vanilla. Mix in the uncooked oatmeal until they are entirely covered. 


Drop cookies by spoonfuls onto a wax sheet or parchment paper. 


Let cool about a half hour to set at room temperature. 


From my experience, chunky peanut butter will tend to make the cookies dryer. Also, quick cooking oat has a nicer texture and you'll use fewer oats in the mix. I prefer the old fashion oats, though, just because that what I'm used to. 

I hope you enjoy the recipe, if so, please share with your friends and family! 


Friday, March 10, 2017

Irish Butter Shortbread Cookies with Real Irish Butter!


Pearl Before Swine Irish Butter Shortbread Cookies, old-fashioned recipes

Typically, shortbread cookies are served at Christmas and for some even New Years. Other countries eat them all year long. 

Shortbread cookies, according to Wikipedia, originated in Scotland with the first printed recipe as early as 1736 from a Mrs. Mclintock.

What makes it a shortbread cookie is the ratio of one part butter, two parts sugar and three parts flour. Not only that but the butter you use makes a huge difference too. Irish butter is richer in fat. Making these a tasty buttery cookie that is light and sweet. 

The traditional shortbread cookie is made into one of three shapes. A circle, individual biscuits, or an oblong slab. 

Today we'll be making the traditional round or circle shaped butter cookie. One because it is easiest to do and two because I like the smaller size cookies. Slabs and biscuits are nice too but not as much my style. 

Irish Butter Shortbread Cookie Recipe Pearl Before Swine

Ingredients:

1 cup or 2 sticks real Irish unsalted butter
room temperature

1/2 cup plus 1 T sugar
2-1/2 cups all-purpose flour
More flour for the working surface.

Directions:

Now according to most professional chefs, correctly creaming your butter and sugar together can be a real challenge and affect how your recipe turns out. 

 Preheat oven to 300 degrees F. 
Pre-line two baking sheets with parchment paper and set them aside. 

Cream together room temperature butter cut into cubes and sugar with an electric mixer and paddle attachment. 

Irish Butter Shortbread Cookie Recipe Pearl Before Swine

After fully blended, put the mixer on low and slowly add the flour little by little. 

Continue mixing until it begins to form a dough ball. 

Transfer dough to a lightly floured surface and roll it out to about 1/4" thickness. Make sure to dust your rolling pin with a tab bit of flour as well. 

Cut the dough using a cookie cutter or my favorite a small cup. They can also be cut into different shapes like little shamrocks or fancy squares. 

Irish Butter Shortbread Cookie Recipe Pearl Before Swine

Transfer to cookie sheet about an inch apart. Gather all leftover dough, reshape into a ball and repeat the process. 

Before careful to not overwork your dough. Bake around 25-30 minutes or until they just start to turn golden brown. 

Remove to rack for cooling. Makes 3-4 dozen cookies. 

*Note* Real Irish butter, I prefer the Kellygold kind can be found at many of your local markets and or grocery stores. Search the website here for a store in your area. 

These are also great dyed a pretty green for St. Paddy's Day. Add the green food coloring when you are creaming together the butter and sugar. 


Thursday, March 9, 2017

Jenny D's Old-Fashioned Jalapeno Jelly


pearl before swine jenny d's old fashioned jalapeno jelly recipe

Living in Arizona you come across some crazy recipes. This one I found in my very own recipe box left by my Grandma. Those boxes are jammed packed full of old-fashioned recipes, most I've never heard of, this being one of them. 

So, I thought why not give it a try! Note that I am not a big peppers fan and I'm not really sure what you'd eat this with but I believe I've come up with a few ideas, which I listed below as well. 

Plus, with St. Patty's Day right around the corner, this green jelly may be just what the Leprechaun ordered! 

Ingredients:

4 medium green peppers
2 2" jalapenos
6 1/2 cups sugar
1 1/2 cups white vinegar
1 tea cayenne
6 oz. certo (liquid)

Directions:


Slice and dice your peppers and jalapenos. Make sure to wash your hand or wear gloves, these little babies leave a residue on your hands that burn or irritate the skin. 

Add peppers and jalapenos to puree blender. Blender for 2 minutes or until they are well chopped. 

Take all ingredients except Certo and add to a medium-sized saucepan. Bring to a boil. 

Add Certo and boil for 1 minute. Fill jars and seal. 

Should last a few weeks to a couple months in the fridge. 


How to eat it? 

You can eat it served on a Ritz cracker. Spread cracker (your choice of style) with cream cheese. Add a teaspoon or more of Jalapeno jelly. Enjoy! 

Make a cream cheese and Jalapeno jelly cheese spread! Scoop out cream cheese into a small bowl. Cover the top with jelly, dip crackers. 

Or 

What I like to do is use as a marinade or glaze for cooking meat. Chicken, pork, or beef works great.  Just take a good size amount, depending on the size of meat being cooked. Add and smear over top and sides. Cook or grill as usual. 

It adds a yummy, spicy yet sweet taste to any meal! 

If you have other ways to eat it, please comment below! I'd love to hear about that!